ปัญหาที่อาจเกิดขึ้นในการนำเข้าสินค้าจากจีน มีอะไรบ้าง?
การชิปปิ้งจากจีน คือ การนำสินค้าจากจีนมายังประเทศไทย โดยผ่านกระบวนการขนส่ง ซึ่งในปัจจุบันมีให้เลือกใช้บริการได้หลายช่องทาง

การชิปปิ้งจากจีน คือ การนำสินค้าจากจีนมายังประเทศไทย โดยผ่านกระบวนการขนส่ง ซึ่งในปัจจุบันมีให้เลือกใช้บริการได้หลายช่องทาง
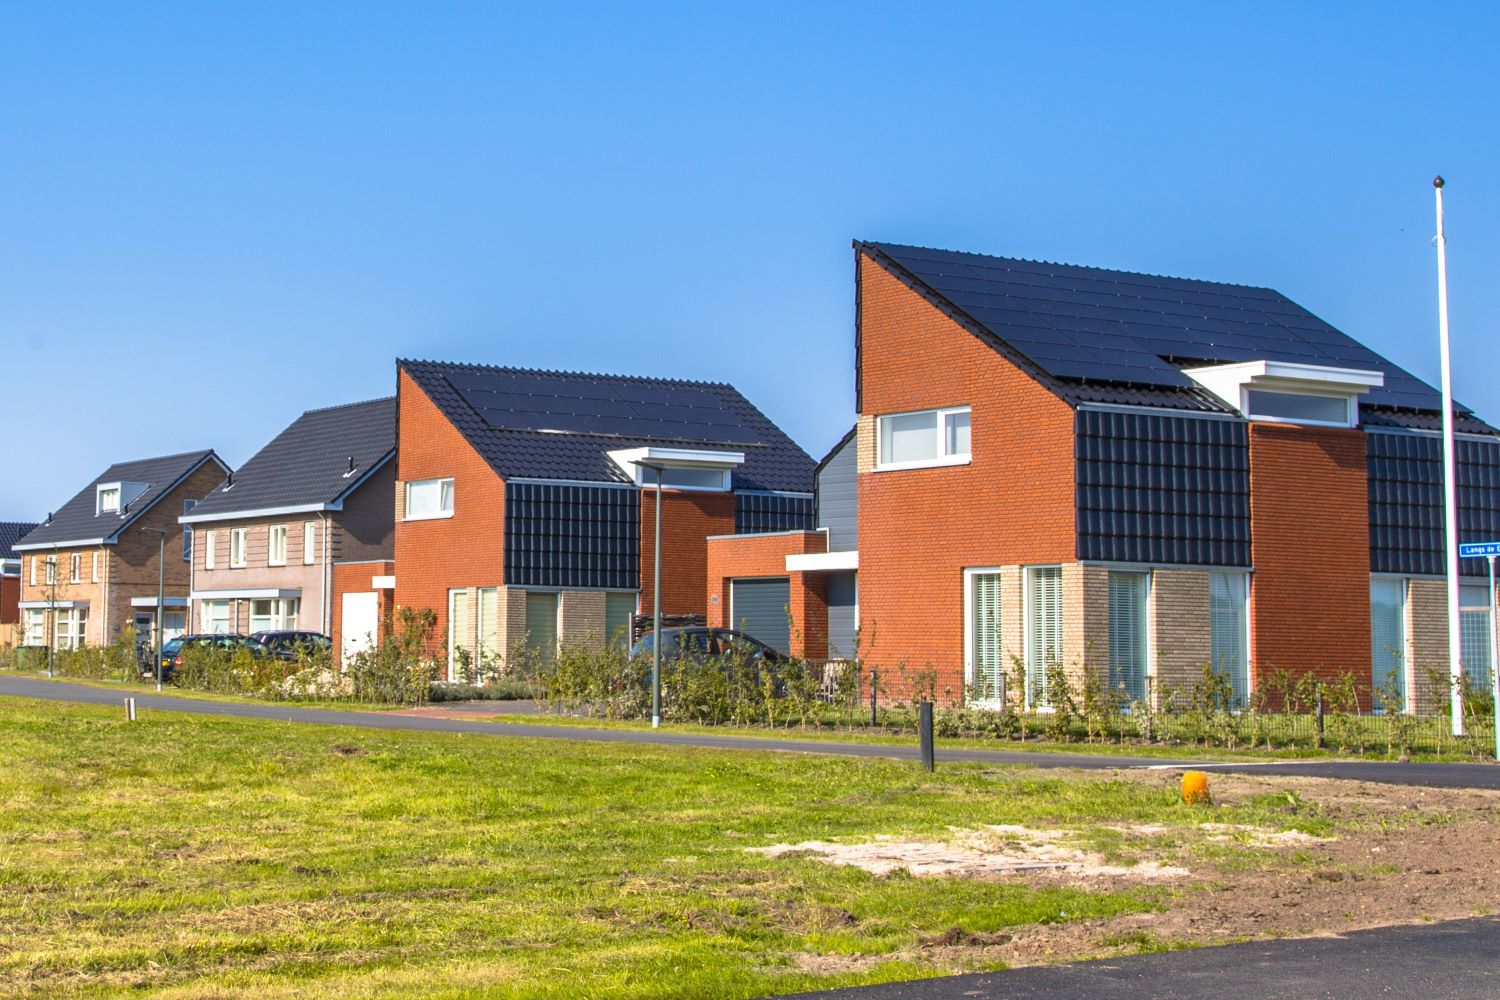
การสร้างบ้านหรูเป็นการลงทุนครั้งใหญ่ที่ต้องใช้เงินจำนวนมาก ดังนั้นจึงเป็นเรื่องสำคัญที่เจ้าของบ้านจะต้องเลือกบริษัทรับสร้างบ้านหรูที่มีคุณภาพและน่าเชื่อถือ เพื่อให้ได้บ้านที่ตรงกับความต้องการและคุ้มค่ากับเงินที่จ่ายไป ปัจจัยที่ต้องพิจารณาในการเลือกบริษัทรับสร้างบ้านหรู บริษัทรับสร้างบ้านหรูที่ดีควรมีประสบการณ์และความเชี่ยวชาญในการก่อสร้างบ้านหรูมาแล้วอย่างน้อย 5 ปีขึ้นไป เพื่อให้สามารถดำเนินงานก่อสร้างได้อย่างราบรื่นและมีประสิทธิภาพ ควรศึกษาผลงานที่ผ่านมาของบริษัทรับสร้างบ้านหรู เพื่อประเมินคุณภาพของงานก่อสร้าง เช่น ความสวยงาม สมดุล แข็งแรง ทนทาน เป็นต้น บริษัทรับสร้างบ้านหรูควรมีทีมงานที่มีคุณภาพ ทั้งวิศวกรและช่างผู้ชำนาญงาน เพื่อสามารถทำงานก่อสร้างได้อย่างถูกต้องและปลอดภัย บริษัทรับสร้างบ้านหรูควรเลือกใช้วัสดุคุณภาพสูงและวัสดุที่ทันสมัย เพื่อให้บ้านมีความหรูหราและคงทน บริษัทรับสร้างบ้านหรูควรมีราคาที่เหมาะสมกับคุณภาพของบ้านและวัสดุที่ใช้ บริษัทรับสร้างบ้านหรูควรมีบริการหลังการขายที่ดี เช่น บริการซ่อมแซมฟรีในช่วงระยะเวลารับประกัน เป็นต้น แนวทางในการเลือกบริษัทรับสร้างบ้านหรู การเลือกบริษัทรับสร้างบ้านหรูนั้น เจ้าของบ้านควรศึกษาข้อมูลและเปรียบเทียบราคาจากหลายบริษัทก่อนตัดสินใจ โดยสามารถพิจารณาจากปัจจัยต่างๆ ดังต่อไปนี้ การเลือกบริษัทรับสร้างบ้านหรูนั้น เจ้าของบ้านควรพิจารณาจากปัจจัยต่างๆ อย่างรอบคอบ เพื่อให้ได้บริษัทที่มีคุณภาพและน่าเชื่อถือ จะได้บ้านที่ตรงกับความต้องการและคุ้มค่ากับเงินที่จ่ายไป
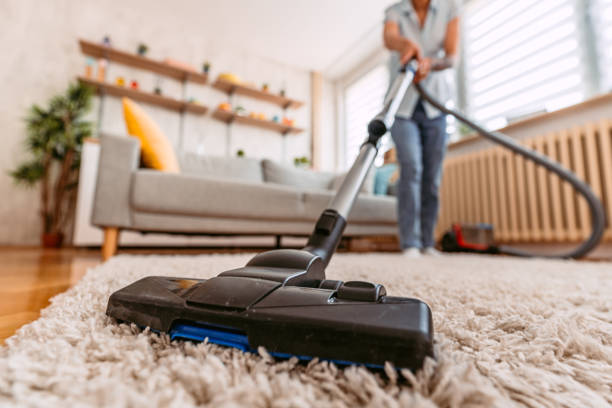
พรมเป็นตัวเลือกยอดนิยมสำหรับเจ้าของบ้านหลายคนที่ต้องการตกแต่งบ้านให้สวยงาม น่าอยู่ ซึ่งนอกเหนือจากนี้แล้วมันยังมอบความสบาย ความอบอุ่น และความสวยงามโดยรวมได้เป็นอย่างดีด้วย อย่างไรก็ตาม ข้อเสียของการมีพรมคือมันมักจะปัญหาในแง่ของการดักสิ่งสกปรก และสารก่อภูมิแพ้ ซึ่งอาจนำไปสู่ปัญหาสุขภาพหากปล่อยทิ้งไว้โดยไม่ทำความสะอาด ดังนั้นแล้วการทำความสะอาดพรมเป็นประจำเป็นสิ่งจำเป็นสำหรับการดูแลบ้านให้สะอาดและป้องกันการสะสมของสิ่งสกปรกและสารก่อภูมิแพ้ที่เป็นอันตราย ในบทความนี้ เราจะพูดถึงบริการทำความสะอาดพรมในบ้านและวิธีที่พวกเขาสามารถช่วยให้พรมของคุณสะอาดและมีสุขภาพดี บริการซักพรมบ้านคืออะไร? บริการซักพรมตามบ้านเป็นบริการทำความสะอาดแบบมืออาชีพที่เน้นการรักษาความสะอาดของพรมในบ้านของคุณ บริการทำความสะอาดพรมใช้อุปกรณ์พิเศษและน้ำยาทำความสะอาดเพื่อขจัดสิ่งสกปรก ฝุ่นละออง และสารก่อภูมิแพ้ออกจากพื้นพรม บริการทำความสะอาดพรมสามารถช่วยปรับปรุงคุณภาพอากาศในบ้านของคุณโดยการกำจัดฝุ่นในอากาศและลดปฏิกิริยาการแพ้ต่อฝุ่นและสารระคายเคือง ละอองเกสร เชื้อรา และสารก่อภูมิแพ้อื่นๆ ที่สะสมอยู่ในพรมของคุณเมื่อเวลาผ่านไป ทำไมบริการซักพรมถึงสำคัญ? โดยสรุปก็คือการบริการรับซักพรมบ้านเป็นสิ่งจำเป็นสำหรับการรักษาสภาพแวดล้อมภายในบ้านให้สะอาดและถูกสุขลักษณะ โดยที่การบริการเหล่านี้สามารถขจัดสิ่งสกปรก ฝุ่นละออง และสารก่อภูมิแพ้ออกจากพรมได้อย่างมีประสิทธิภาพ ทั้งยังปรับปรุงคุณภาพอากาศภายในอาคาร และลดความเสี่ยงต่อปัญหาสุขภาพ หากต้องการเลือกบริการทำความสะอาดพรมในบ้านที่เหมาะสม ให้ศึกษาประสบการณ์ของบริษัท ชื่อเสียง การรับรอง และการบริการต่างๆ ที่นำเสนอ เมื่อปฏิบัติตามคำแนะนำเหล่านี้แล้วคุณจะสามารถเลือกบริการทำความสะอาดที่ดีที่สุดที่จะให้งานที่มีคุณภาพและฟื้นฟูพรมของคุณให้อยู่ในสภาพที่ดีที่สุดอีกครั้งได้อย่างไม่ต้องสงสัย
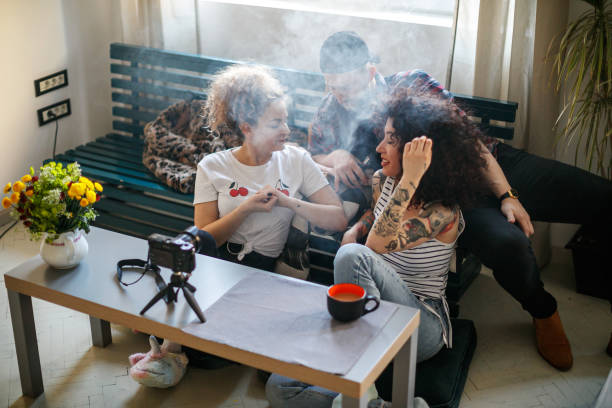
ตลาดบุหรี่ไฟฟ้ามีการเติบโตอย่างก้าวกระโดดในช่วงไม่กี่ปีที่ผ่านมา โดยมีผู้ค้าปลีกและผู้ประกอบการจำนวนมากที่ใช้ประโยชน์จากอุตสาหกรรมที่กำลังขยายตัวนี้ ในขณะที่การแข่งขันยังคงดุเดือด การกำหนดกลยุทธ์ที่มีประสิทธิภาพสำหรับการขายบุหรี่ไฟฟ้าและสร้างความโดดเด่นในตลาดนั้นเป็นสิ่งสำคัญ ในบทความนี้ จะนำเสนอเคล็ดลับง่ายๆ ในการส่งเสริมธุรกิจขายบุหรี่ไฟฟ้าของคุณ กำหนดกลุ่มเป้าหมายของคุณให้ชัดเจน ในการสร้างแบรนด์ให้ประสบความสำเร็จและสร้างผลกำไร การทำความเข้าใจกลุ่มเป้าหมายของคุณเป็นสิ่งสำคัญ กำหนดข้อมูลประชากร ความชอบ และความต้องการของผู้มีโอกาสเป็นลูกค้าของคุณ ทำให้คุณปรับแต่งข้อเสนอผลิตภัณฑ์และแคมเปญการตลาดได้อย่างเหมาะสม การตอบสนองความต้องการเฉพาะของตลาดเป้าหมายทำให้คุณมีแนวโน้มที่จะดึงดูดความสนใจและกระตุ้นยอดขายได้ เลือกสรรสินค้าที่จะนำมาขายอย่างรอบรู้ นำเสนอบุหรี่ไฟฟ้าที่หลากหลาย โดยเน้นที่อุปกรณ์ยอดนิยม เช่น Relx พอตบุหรี่ไฟฟ้าตลอดจนส่วนประกอบ อุปกรณ์เสริม และน้ำยาบุหรี่ไฟฟ้า ตรวจสอบให้แน่ใจว่าได้จัดเก็บรายการที่ตอบสนองทั้งผู้เริ่มต้นและผู้มีประสบการณ์ โดยรองรับความต้องการและความชอบที่แตกต่างกันของพวกเขา การนำเสนอผลิตภัณฑ์ที่ครอบคลุมไม่เพียงดึงดูดผู้ชมที่กว้างขึ้น แต่ยังช่วยวางตำแหน่งร้านค้าของคุณให้เป็นร้านค้าแบบครบวงจรสำหรับทุกสิ่งที่เกี่ยวกับบุหรี่ไฟฟ้าและพอต ให้คำอธิบายผลิตภัณฑ์และการรีวิว ใช้เวลาในการจัดทำคำอธิบายผลิตภัณฑ์ที่ให้ข้อมูลสำหรับแต่ละรายการที่คุณขาย เน้นคุณสมบัติหลัก ประโยชน์ และจุดขายเฉพาะใดๆ หรือนำรีวิวเป็นคอมเมนต์หรือคลิปวิดีโอต่างๆมาใช้ เพื่อให้ความรู้แก่ลูกค้าและแสดงความเชี่ยวชาญของคุณในเรื่องนั้นๆ สิ่งนี้ทำให้มั่นใจได้ว่าผู้ซื้อที่มีศักยภาพสามารถตัดสินใจได้อย่างรอบรู้ และทำให้ร้านบุหรี่ไฟฟ้าของคุณแตกต่างจากร้านอื่นด้วยความที่ร้านคุณเชื่อถือได้และมีความรู้ในอุตสาหกรรมบุหรี่ไฟฟ้า เสนอโปรโมชั่นและส่วนลดต่างๆ เพิ่มยอดขายโดยการจัดโปรโมชั่น ส่วนลด และข้อเสนอพิเศษเป็นประจำ กลยุทธ์ทางการตลาดเหล่านี้ไม่เพียงแต่กระตุ้นให้ผู้ซื้อ ซื้อครั้งแรกเพื่อลองใช้ผลิตภัณฑ์ของคุณเท่านั้น แต่ยังส่งเสริมความภักดีของลูกค้าต่อร้านขายบุหรี่ไฟฟ้าของคุณซ้ำอีกด้วย พิจารณาการเสนอข้อเสนอแบบซื้อเป็นเซ็ตหรือโปรโมชั่น ใช้ประโยชน์จากพลังของโซเชียลมีเดีย ใช้ศักยภาพของโซเชียลมีเดีย อย่าง TikTok ที่กำลังมาแรงพื่อโปรโมตร้านขายบุหรี่ไฟฟ้าของคุณ แบ่งปันรูปภาพ วิดีโอ และเนื้อหาข้อมูลที่แสดงถึงผลิตภัณฑ์ของคุณและวางหน้าเว็บหรือไลน์ออฟฟิเชียล แอคเคาท์ที่น่าเชื่อถือ มีส่วนร่วมกับลูกค้าผ่านความคิดเห็นและข้อความ กระตุ้นการเข้าชม […]
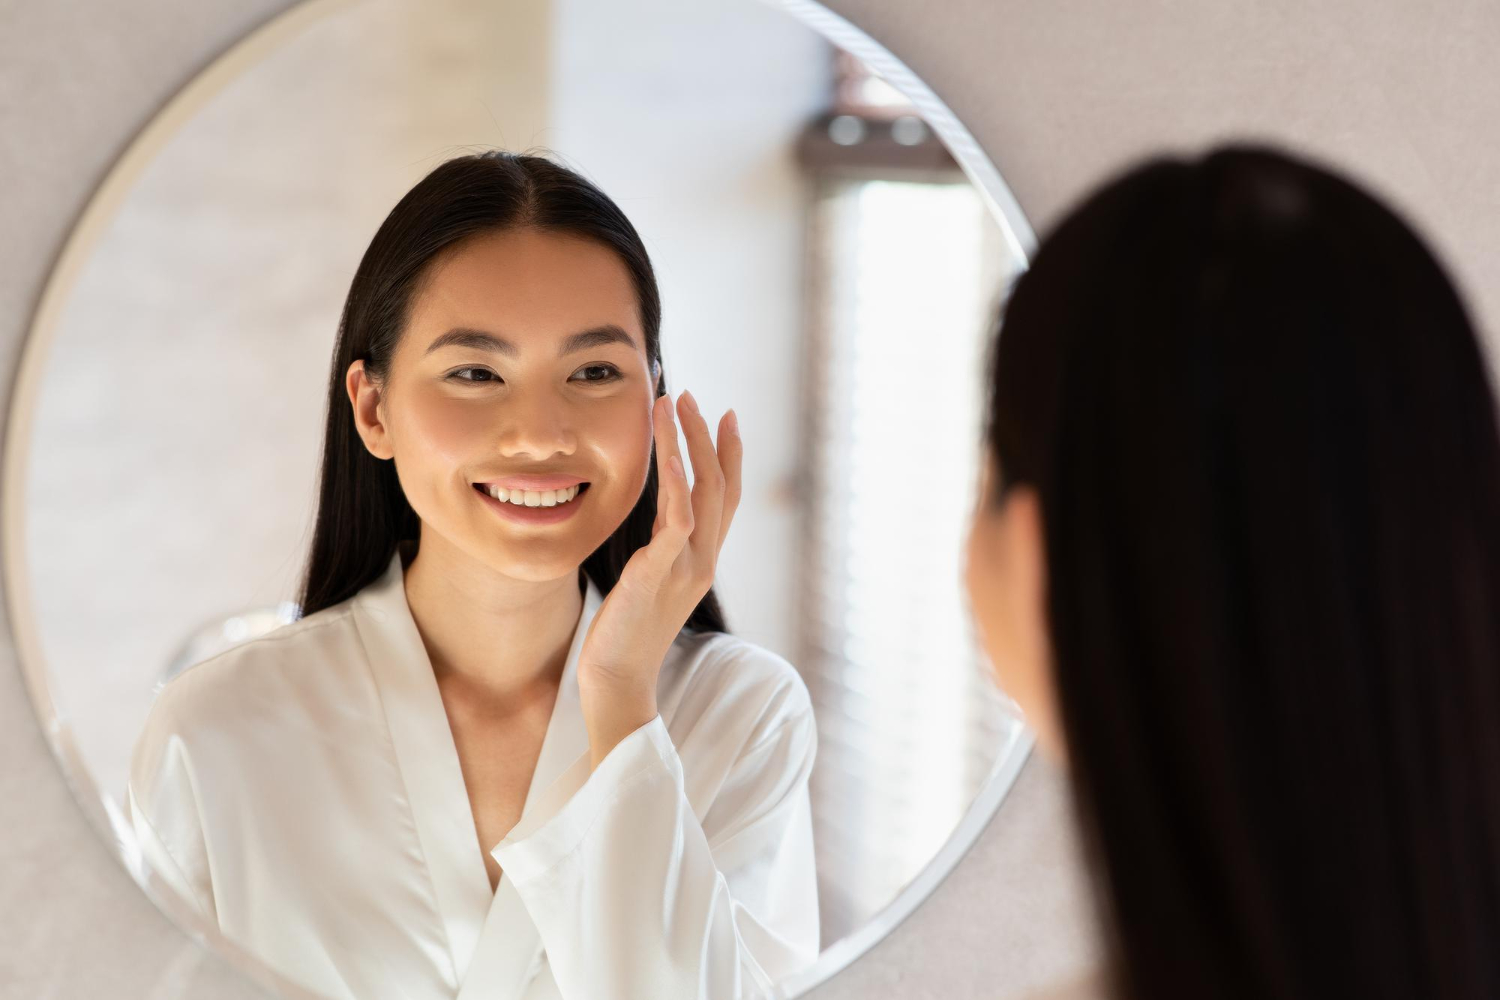
มอยซ์เจอร์ไรซ์เซอร์ เป็นหนึ่งในสกินแคร์รูทีนที่หลายคนมองข้ามมากที่สุด เพราะคิดว่าไม่จำเป็นอะไรกับผิวหน้า จริงๆ แล้ว มอยซ์เจอร์ไรซ์เซอร์ เป็นผลิตภัณฑ์ที่ทำหน้าที่เพิ่มความชุ่มชื้นให้แก่ผิว ช่วยฟื้นฟูผิวแห้งกร้าน ปรับสีผิวให้สม่ำเสมอ ปกป้องผิวจากสิ่งสกปรกภายนอก บรรเทาอาการผิวหนังอักเสบชนิดไม่รุนแรง ลดเลือนริ้วรอยร่องตื้น และช่วยปรับสภาพผิวก่อนลงเครื่องสำอาง ดังนั้นการใช้มอยส์เจอไรเซอร์เป็นประจำจึงเป็นเคล็ดลับจัดการความร่วงโรยของผิวหน้าและทำให้เมคอัพติดทนและเรียบเนียนกับผิวยิ่งขึ้นนั่นเอง วันนี้เราจะมาบอกวิธีเลือกมอยซ์เจอร์ไรซ์เซอร์อย่างไรให้ดีกับผิวกันเลย ผิวปกติทั่วไป เรียกได้ว่าเป็นผิวที่ปกติสุข ไม่มีปัญหาผิวใดๆ เพราะเป็นลักษณะผิวที่ไม่แห้งหรือไม่มันจนเกินไป สามารถใช้มอยส์เจอไรเซอร์ฐานน้ำ ซึ่งอาจอยู่ในรูปแบบโลชั่น เพื่อที่จะได้รู้สึกแห้งเร็ว เบาสบายผิว ไม่รู้สึกเหนียวเหนอะหนะจนเกินไป หรือหากต้องการความชุ่มชื้นมากๆ ก็สามารถใช้มอยส์เจอไรเซอร์ที่เป็นฐานน้ำมันได้ สามารถเลือกใช้ตามสภาพอากาศของบ้านเราได้เลย ผิวแห้ง ลักษณะผิวจะค่อนข้างแห้งและขาดน้ำ จึงควรใช้มอยส์เจอไรเซอร์อย่างสม่ำเสมอ ขะแนะนำให้ใช้มอยส์เจอไรเซอร์ฐานน้ำมันเป็นสำคัญ เพื่อให้น้ำมันเคลือบผิวไม่ให้ความชื้นจากผิวระเหยออกไป ซึ่งเนื้อของผลิตภัณฑ์อาจมีความข้นหรือหนืดมากกว่าปกติ หากท่านใดมีผิวที่แห้งมากเป็นพิเศษ อาจใช้ผลิตภัณฑ์ที่มีเนื้อเป็นขี้ผึ้งซึ่งมีความสามารถในการคลือบผิว ทำให้ลดการระเหยของน้ำได้มากกว่าผลิตภัณฑ์ชนิดโลชั่นหรือครีม ผิวมัน เป็นผิวที่มันวาวเนื่องจากมีการผลิตน้ำมันส่วนเกินออกมามากกว่าปกติ และอาจมีสิวด้วยในบางคน ซึ่งจริงๆ แล้วผิวประเภทนี้ต้องการความชุ่มชื้นด้วย มอยส์เจอไรเซอร์ที่แนะนำให้ใช้จะเป็นแบบฐานน้ำ ที่อาจอยู่ในรูปแบบโลชั่นเหลว ซึ่งจะไม่ทำให้หนักหน้าและก่อให้เกิดการอุดตัน ควรหลีกเลี่ยงผลิตภัณฑ์ที่มีส่วนประกอบเป็นสารที่เป็นน้ำมันด้วย ผิวผสม ลักษณะผิวบางบริเวณจะแห้งและบางบริเวณ เช่น หน้าผาก จมูก คาง จะมีความมัน อาจเลือกใช้มอยส์เจอไรเซอร์ที่มีความหนืดเเละให้ความชุ่มชื้นปานกลาง เป็นเนื้อโลชั่นกึ่งครีม หรืออาจเลือกใช้ให้เหมาะสมกับแต่ละส่วน […]
ในยุคที่การใช้ชีวิตมีแต่ความเร่งรีบ และให้ความสำคัญกับเวลา รถจักรยานยนต์ เป็นอีกหนึ่งวิธีเดินทางที่คนยุคนี้นิยมเพราะทั้งสะดวกและรวดเร็ว ดังนั้นการมี ประกันภัย รถจักรยานยนต์ เอาไว้คุ้มครองทุกการเดินทางก็เป็นสิ่งที่จำเป็นไม่น้อย และในยุคเทคโนโลยีแบบนี้ ประกัน รถจักรยานยนต์ สามารถเลือกซื้อผ่านเว็บไซต์ออนไลน์ได้แล้ว จะมีเว็บไหนบ้างไปดูกัน roojai.com รู้ใจ ประกันออนไลน์ มีจุดเด่นในเรื่องของการให้บริการประกันภัยออนไลน์ มีประกันรถมอเตอร์ไซค์บิ๊กไบค์ เหมาะกับผู้ขับขี่บิ๊กไบค์ที่สุด และมีประเภทของประกันภัยให้เลือกถึง 5 ประเภท ตั้งแต่ประกันภัยชั้น 1 ประกันภัยชั้น 2+ ประกันภัยชั้น 2 ประกันภัยชั้น 3และประกันภัยชั้น 3+ รับประกันเรื่องการให้ความคุ้มครองอย่างครอบคลุมในราคาที่ถูกกว่า หากเจอที่อื่นราคาถูกกว่าภายใต้เงื่อนไขการคุ้มครองเดียวกันยินดีคืนเงิน insure.724.co.th เว็บไซต์นายหน้าขายประกันภัยต่างๆ นอกจากจะมีประกันภัย รถจักรยานยนต์จากบริษัทประกันภัยชั้นนำแล้ว ยังมีประกันชีวิต ประกันสุขภาพ ประกันรถยนต์ รวมถึงประกันการเดินทาง นับว่าครอบคลุมเรื่องประกันภัยและ ประกันภัย รถจักรยานยนต์ จาก 724 ประกันภัย ก็มีให้เลือกอย่างหลากหลายตามรูปแบบการใช้งานและผู้ขับขี่อีกด้วย เช่น ประกันภัย รถจักรยานยนต์ สำหรับ ไรเดอร์หรือคนส่งของ และประกันภัยทั่วไปประเภทต่างๆ tidlor.com […]
ทวีปยุโรป ถือเป็นพื้นที่แหล่งรวมอารยธรรม ศิลปะ วัฒนธรรม ที่เลื่องชื่อระดับโลก และยังมีสถาปัตยกรรมที่สวยงดงาม จนกลายเป็น 1 ใน 7 สิ่งมหัศจรรย์ของโลก และกลายเป็นโลเคชั่นที่เหล่านักท่องเที่ยวทั่วโลกต้องมาดูสักครั้งในชีวิต ฉะนั้นวันนี้เราเลยมี 5 สถาปัตยกรรมในทวีปยุโรป มาฝากทุกคนกัน 5 สถาปัตยกรรม ชื่อดัง ทวีปยุโรป 1.สนามกีฬากรุงโรม สนามกีฬากรุงโรม หรือ Colosseum of Rome ตั้งอยู่ที่ กรุงโรม ประเทศอิตาลี ซึ่งปัจจุบันยังเปิดให้นักท่องเที่ยวเข้าเยี่ยมชม ซึ่งในอดีตสนามกีฬากรุงโรม สร้างขึ้นเมื่อปี พ.ศ. 615 – 623 อาณาจักรกรุงโรม ลักษณะจะเป็นรูปตึกวงกลมก่อด้วยอิฐและหินขนาดใหญ่ มี 4 ชั้น ภายในสามารถจุคนดูได้ถึง 80,000 คน 2.หอเอนเมืองปิซา ตั้งอยู่ในเมืองปิซา ในจัตุรัสเปียซซา เดล ดูโอโม ประเทศอิตาลี โดยหอเอนปิซาเป็นหอที่สร้างด้วยหินอ่อนรูปทรงที่แตกต่าง มีความสูง 54 เมตร มีจำนวน […]
ตั้งแต่ที่มีการระบาดของเชื้อไวรัสโควิด 19 ทำให้หลายพื้นที่ท่องเที่ยวในต่างประเทศต่างต้องปิดตัว หรือมีรอบเข้าและจำกัดคนเข้าชม ซึ่งหนึ่งในสถานที่ที่ต้องจำกัดคนคือ พิพิธภัณฑ์ หรือ แม้กระทั่งที่แกลลอรี่เองก็จำกัดรอบ จำกัดคนเข้าชม จึงตอนนี้มีเว็บไซต์ที่สามารถชมงานศิลปะออนไลน์ เพื่อตอบโจทย์ยุคสมัยที่เปลี่ยนแปลงไป เพราะฉะนั้นวันนี้เราเลยมี 5 เว็บไซต์สำหรับชมงานศิลปะแบบออนไลน์มาฝากทุกคน 5 เว็บไซต์ชมศิลปะออนไลน์จากทั่วโลก 1.Google Arts & Culture เว็บไซต์แรกที่สามารถชมงานศิลปะได้นั่นก็คือ Google Arts & Culture โดยในเว็บจะพาเราไปชมศิลปะจากศิลปินที่มีชื่อเสียงทั่วโลก ผ่านรูปภาพแบบออนไลน์ โดยทาง Google Arts & Culture ได้ร่วมมือกับพิพิธภัณฑ์กว่า 1200 แห่งทั่วโลก และสถาบันอื่นๆ อีก 70 ประเทศ แบ่งหมวดให้เราได้ชมงานศิลปะ และแบ่งยุคสมัยของศิลปะเอาไว้อย่างชัดเจน 2.Van Gogh Museum ถ้าพูดถึงศิลปินที่มีชื่อเสียง และเป็นที่รู้จักของคนทั่วโลกอย่าง Vincent Van Gogh เอง ก็มีเว็บไซต์ที่เราสามารถชมงานศิลปะของ Vincent Van Gogh แบบออนไลน์ได้เช่นกัน […]
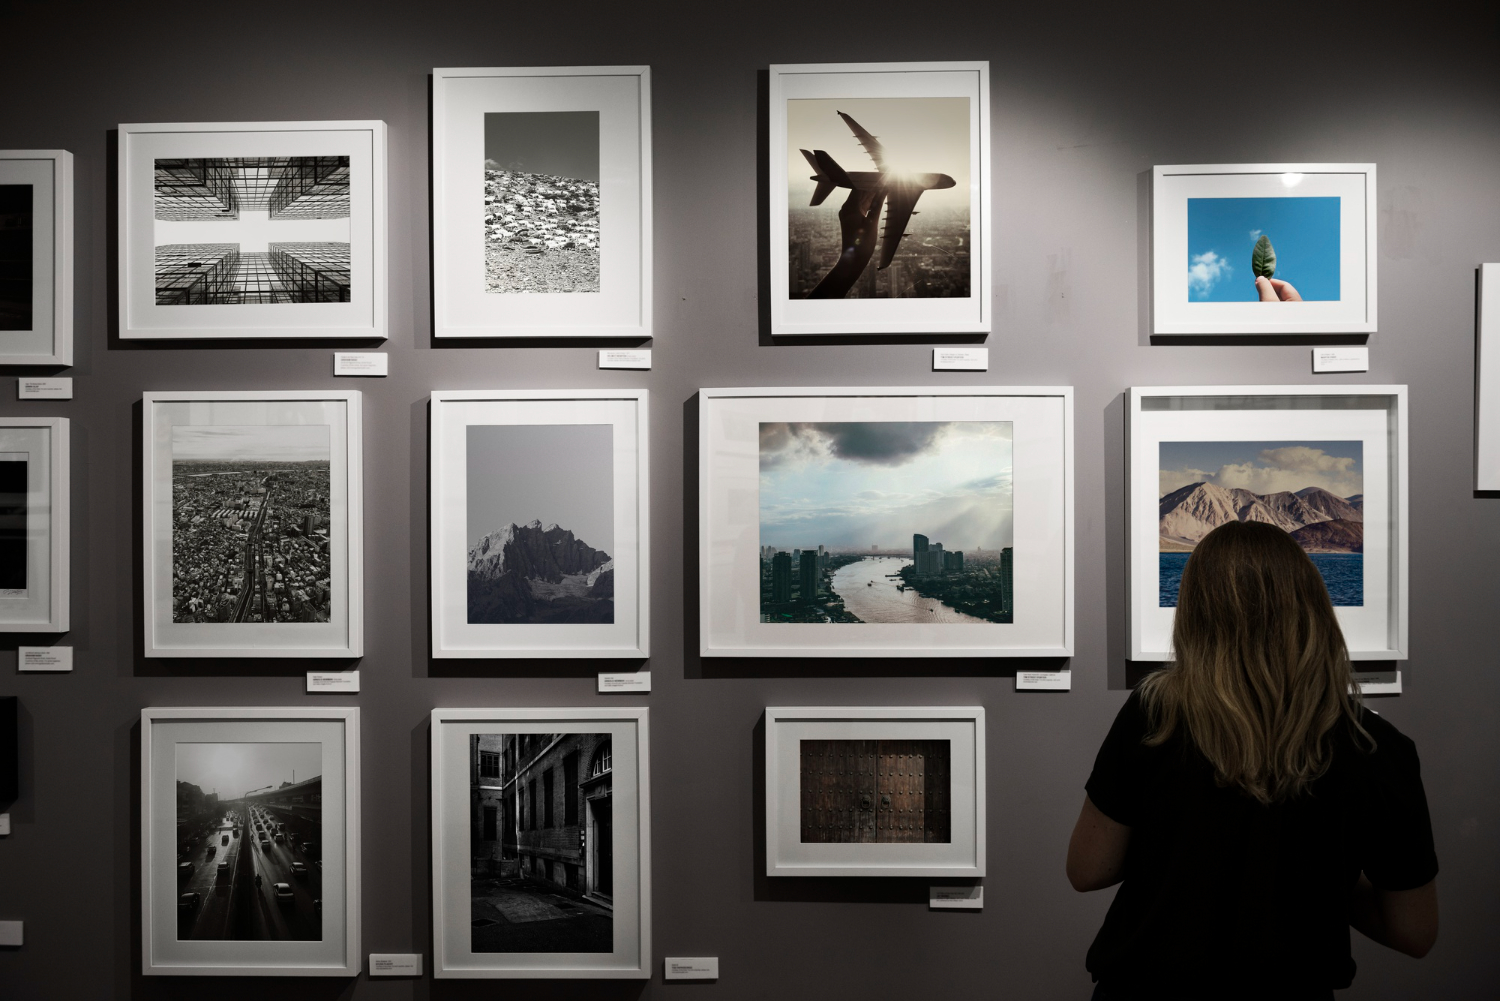
สำหรับใครที่มองหาที่เที่ยวในกรุงเทพฯ หรือใกล้กรุงเทพฯ แต่ไม่รู้ว่าจะไปเที่ยวที่ไหนดี เบื่อที่จะไปเที่ยวในห้างสรรพสินค้า วันนี้เรามีไอเดียเที่ยวแบบสายติส สายชอบงานศิลปะ กับแกลลอรี่อาร์ต กรุงเทพฯ มาฝาก เพื่อเปลี่ยนบรรยากาศในการเที่ยววันหยุดเสาร์ อาทิตย์ หรืออยากหาเวลาพักผ่อนแบบอื่นก็สามารถเอาไอเดียหอศิลป์ในกรุงเทพฯ ไปเที่ยวได้เลย 1.พิพิธภัณฑ์ศิลปะไทยร่วมสมัย ถือว่าเป็นพิพิธภัณฑ์ศิลปะไทยร่วมสมัย ที่เป็นแลนด์มาร์คใหม่ของชาวกรุงเทพฯ และปริมณฑล หรือที่เราคุ้นชื่อคือ โมค่า แบงค็อก (MOCA Bangkok) เป็นพิพิธภัณฑ์ที่ก่อตั้งโดย คุณบุญชัย เบญจรงคกุล โดยวัตถุประสงค์คือการเชิดชูเกียรติศิลปินแห่งชาติและศิลปินชั้นยอดเยี่ยม ซึ่งมีทั้งหมด 6 ตัวอาคารและมีทั้งหมด 5 ชั้น โดยผู้เข้าชมสามารถดื่มด่ำกับงานศิลปะ พร้อมจุดถ่ายรูปเพียบ 2.JWD Art Space เจดับบลิวดี อาร์ต สเปช ศูนย์บริการด้านศิลปะร่วมสมัยแบบครบวงจร โดยที่นี้เป็นแหล่งรวมศิลปะกับโลจิสติกส์เข้าด้วยกัน โดยรูปแบบการนำเสนอของที่นี้จะเป็นรูปแบบขนส่ง ที่มีทั้งบริการจัดเก็บ ขนส่ง ดูแล และให้คำปรึกษา รวมถึงยังมีพื้นที่ว่างที่ใช้สำหรับจัดนิทรรศการศิปละทั้งในประเทศไทยและต่างประเทศ ซึ่งนิทรรศการมีการเปลี่ยนหมุนเวียนอยู่ตลอดเวลา ซึ่งคุณสามารถเช็คระยะเวลาการจัดแสดงในเพจของ JWD Art Space ได้เลย 3.ATT 19 […]